TL-WR841N - Part 1 : Reconnaissance
Introduction
This 3-4 part series demonstrates some basic to moderately advanced techniques for analyzing an old TP-Link router in order to build an exemplary attack chain.
Part 1 - Reconnaissance
First, we start the router and then we login via default credentials to see which firmware image is running on this specific device.
 Default credentials login on TP-Link WR841N
  Firmware
Our second step is a basic Nmap service detection scan against the router to find exposed services running by default.
After that, we start AttifyOS, a common IoT pentesting distribution that comes with many useful tools and is based on Ubuntu 22.04.
At this point, I had to do some digging because I wanted the network card of my laptop to supply my VM with Wi-Fi and separately connect the VM to the TP-Link router.
Luckily, i still had an old Edimax N150 adapter that i once bought to set up Tails OS, which did not work at the time.
I was facing the issue that the default driver for this device did not allow the adapter to connect and run properly so I manually had to switch the driver.
The following part will be a tutorial on how to switch a driver while maintaining a solid amount of control and reliable checkpoints.
I already completed the setup, so your output may not match mine exactly.
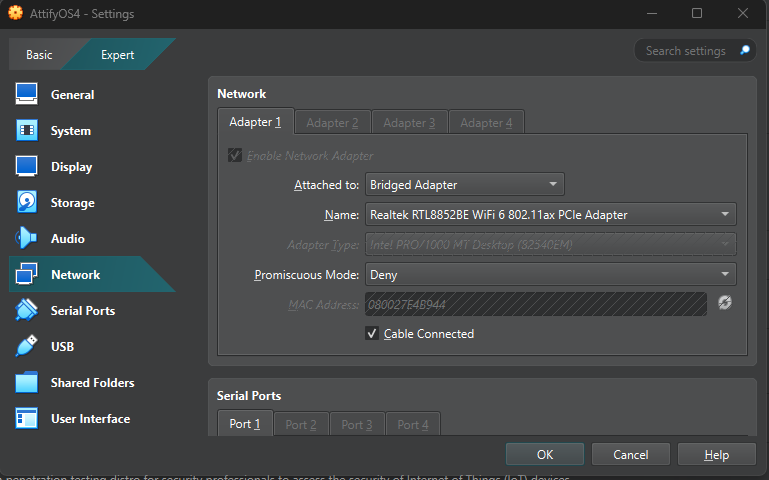
Step 1 - VirtualBox settings
We need two network adapters, one for our regular wifi, the other one for the internal network with our target router. We also need to tell VirtualBox that there is a USB device.
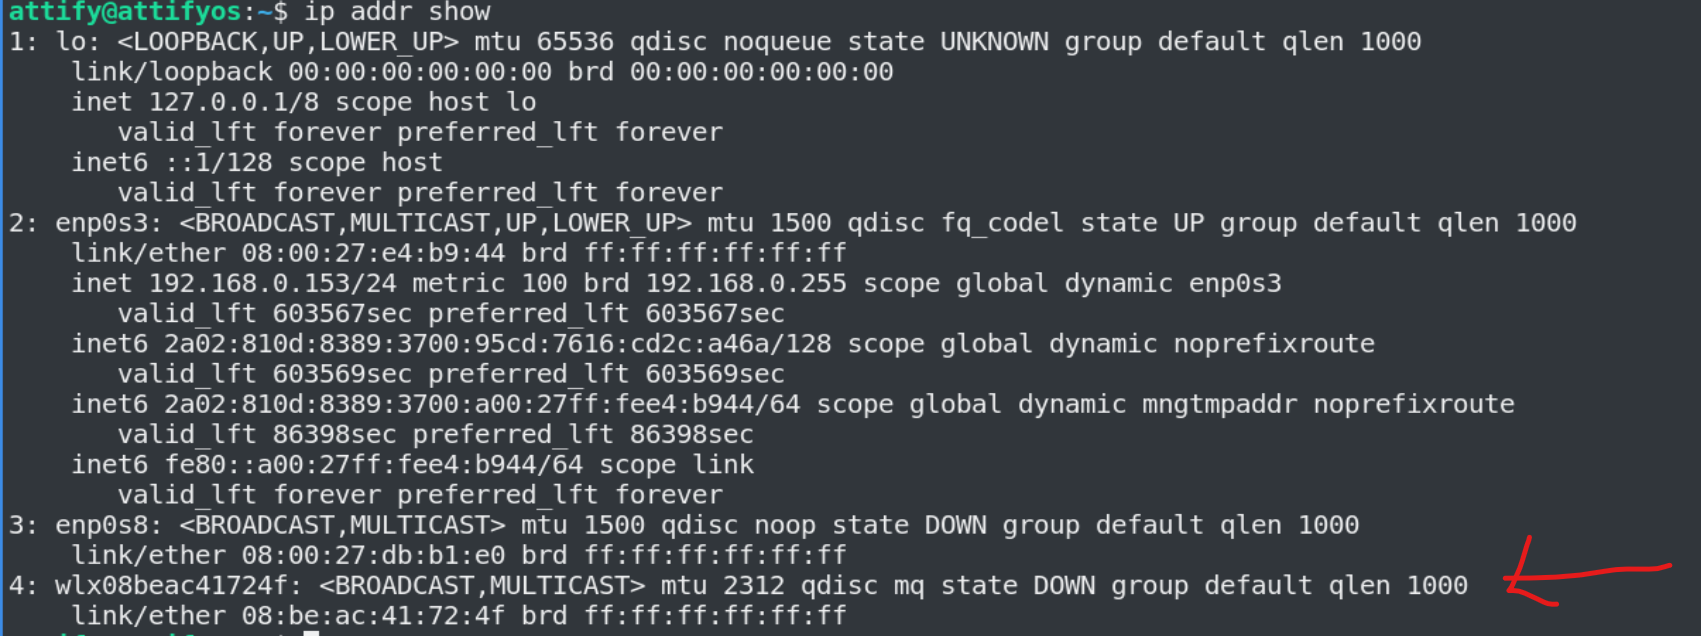
Step 2 - Inspecting the network interfaces
1
ip addr show
Step 3 - Examinating the firmware/driver
1
2
3
sudo dmesg | grep 8188

sudo iw dev wlx08beac41724f scan | grep SSID
Usually, the kernel staging driver is loaded and the iw dev command delivers no results because it is not working properly.
Step 4 - Installing an external driver, in this case from Aircrack-ng
1
2
3
4
5
6
7
8
9
git clone https://github.com/aircrack-ng/rtl8188eus.git

cd rtl8188eus

echo "blacklist r8188eu" | sudo tee /etc/modprobe.d/realtek.conf

make

sudo make install
Step 5 - Checking if our driver was loaded
1
2
3
4
5
lsmod | grep 8188    # was anything loaded?

modinfo 8188eu | grep filename  # what exact file in the specific library got loaded?

sudo dmesg | tail -n 30    # is there any confirmation from the kernel?
Step 6 - removing the old module, loading the new one(if the old one is still loaded)
1
sudo modprobe -r 8188eu && sudo modprobe 8188eu
Step 7 - setting the region and restarting the interface
1
2
3
sudo iw reg set DE
sudo ip link set wlx08beac41724f down
sudo ip link set wlx08beac41724f up
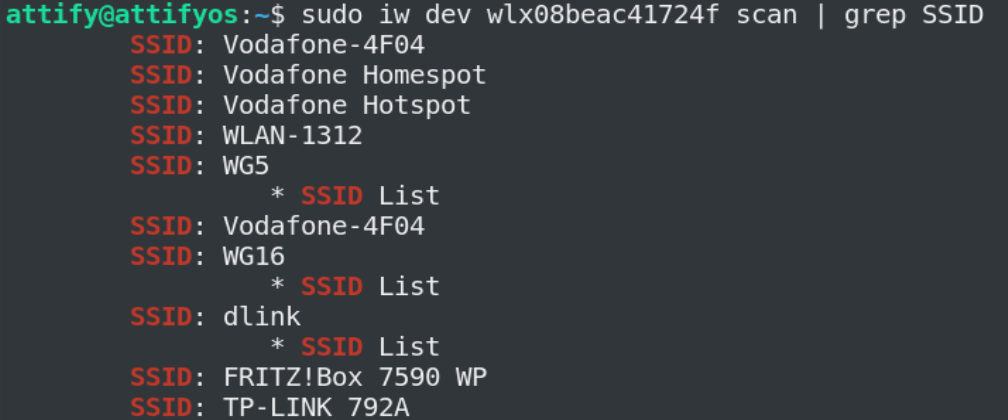
Step 8 - initiating a second scan
1
sudo iw dev wlx08beac41724f scan | grep SSID
When you run iw dev wlx08… scan, the iw tool in user space tells the kernel via the nl80211 interface to instruct the Wi-Fi driver, which commands the hardware card to cycle through channels, capture beacon frames from access points, and then return the results up through the driver and kernel back to iw for display.
We filter this output for SSIDs.
Step 9 - connecting to our interface
1
sudo nmcli dev wifi connect "TP-LINK_792A" password "YOUR_PASSWORD" ifname wlx08beac41724f
At this point you will likely run into the issue that the main internet connection, in my case my private Vodafone 4F04, will be on 192.168.0.1 and sort of in front of your router, making it impossible to reach the browser interface on port 80.
Here is a simple trick if you happen to have this issue.
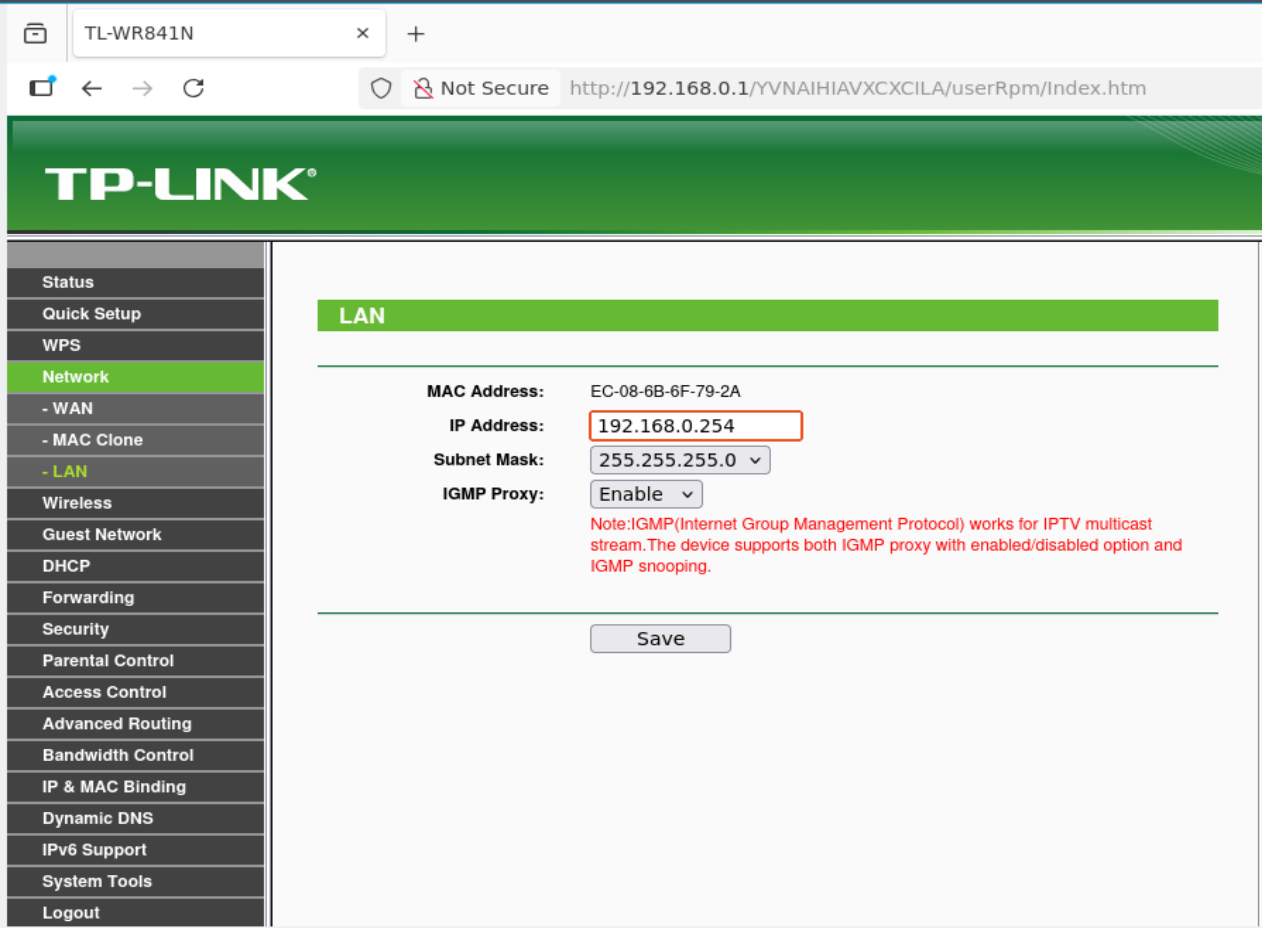
Step 10 - disabling your primary Wi-Fi, setting a new ip adress for the TP-Link
By default, both your ISP router (Vodafone in this case) and your TP-Link use the same subnet 192.168.0.0/24. This leads to a routing conflict: traffic to 192.168.0.254 will be misrouted through the ISP router once enp0s3 is active again.
To fix this permanently, add a static route for the TP-Link’s management IP via the Wi-Fi interface:
1
2
3
4
sudo ip link set enp0s3 down                        #temporarily deactive ISP interface
sudo ip route add 192.168.0.254 dev wlx08beac41724f #set a permanent static route + change ip in the webinterface
sudo ip link set enp0s3 up                          #reactivate the ISP interface
Most routers should have similar options so this is applicable to almost any router.
Changing the ip adress of our TP-Link and setting a permanent static route will finally give is the opportunity to have a functioning Wi-Fi connection and talk to our target router.
-> 192.168.0.1 -> Wi-Fi !!!
-> 192.168.0.254 -> target !!! :)
Step 11 - making the changes permanent
The static route we added earlier only lasts until the VM is shut down or the interface is restarted. After a reboot, it will be gone.
To make the change permanent, you can attach the route directly to the NetworkManager profile of your TP-Link connection:
1
2
sudo nmcli connection modify TP-LINK_792A +ipv4.routes "192.168.0.254/32" #save the route
sudo nmcli connection up TP-LINK_792A                                     #update in current session
This will update the ipv4.routes field in your NetworkManager configuration and ensure that any traffic to 192.168.0.254 is always routed through the Wi-Fi interface wlx08beac41724f, even after a reboot.
Conclusion
At this point, we are ready to move into the second phase: Exploitation. We will extract and inspect the firmware build, analyze the internet-exposed services, and form hypotheses on how an initial userland RCE could be escalated to full system privileges. From there, we will explore persistence mechanisms and the design of a stealthy, obfuscated RAT that would provide permanent control over the compromised device.


